Shiny and the Web
shiny 可以用来构建简单的 Web 应用。但许多时候,一个产品级的 shiny-web 应用需要的自定义策略不被 shiny 包括或被隐藏在 shiny 底层代码中。但完全使用 shiny 也是可以构建一个产品级的 shiny-web 应用的,如 Figure 1 所示的内容:
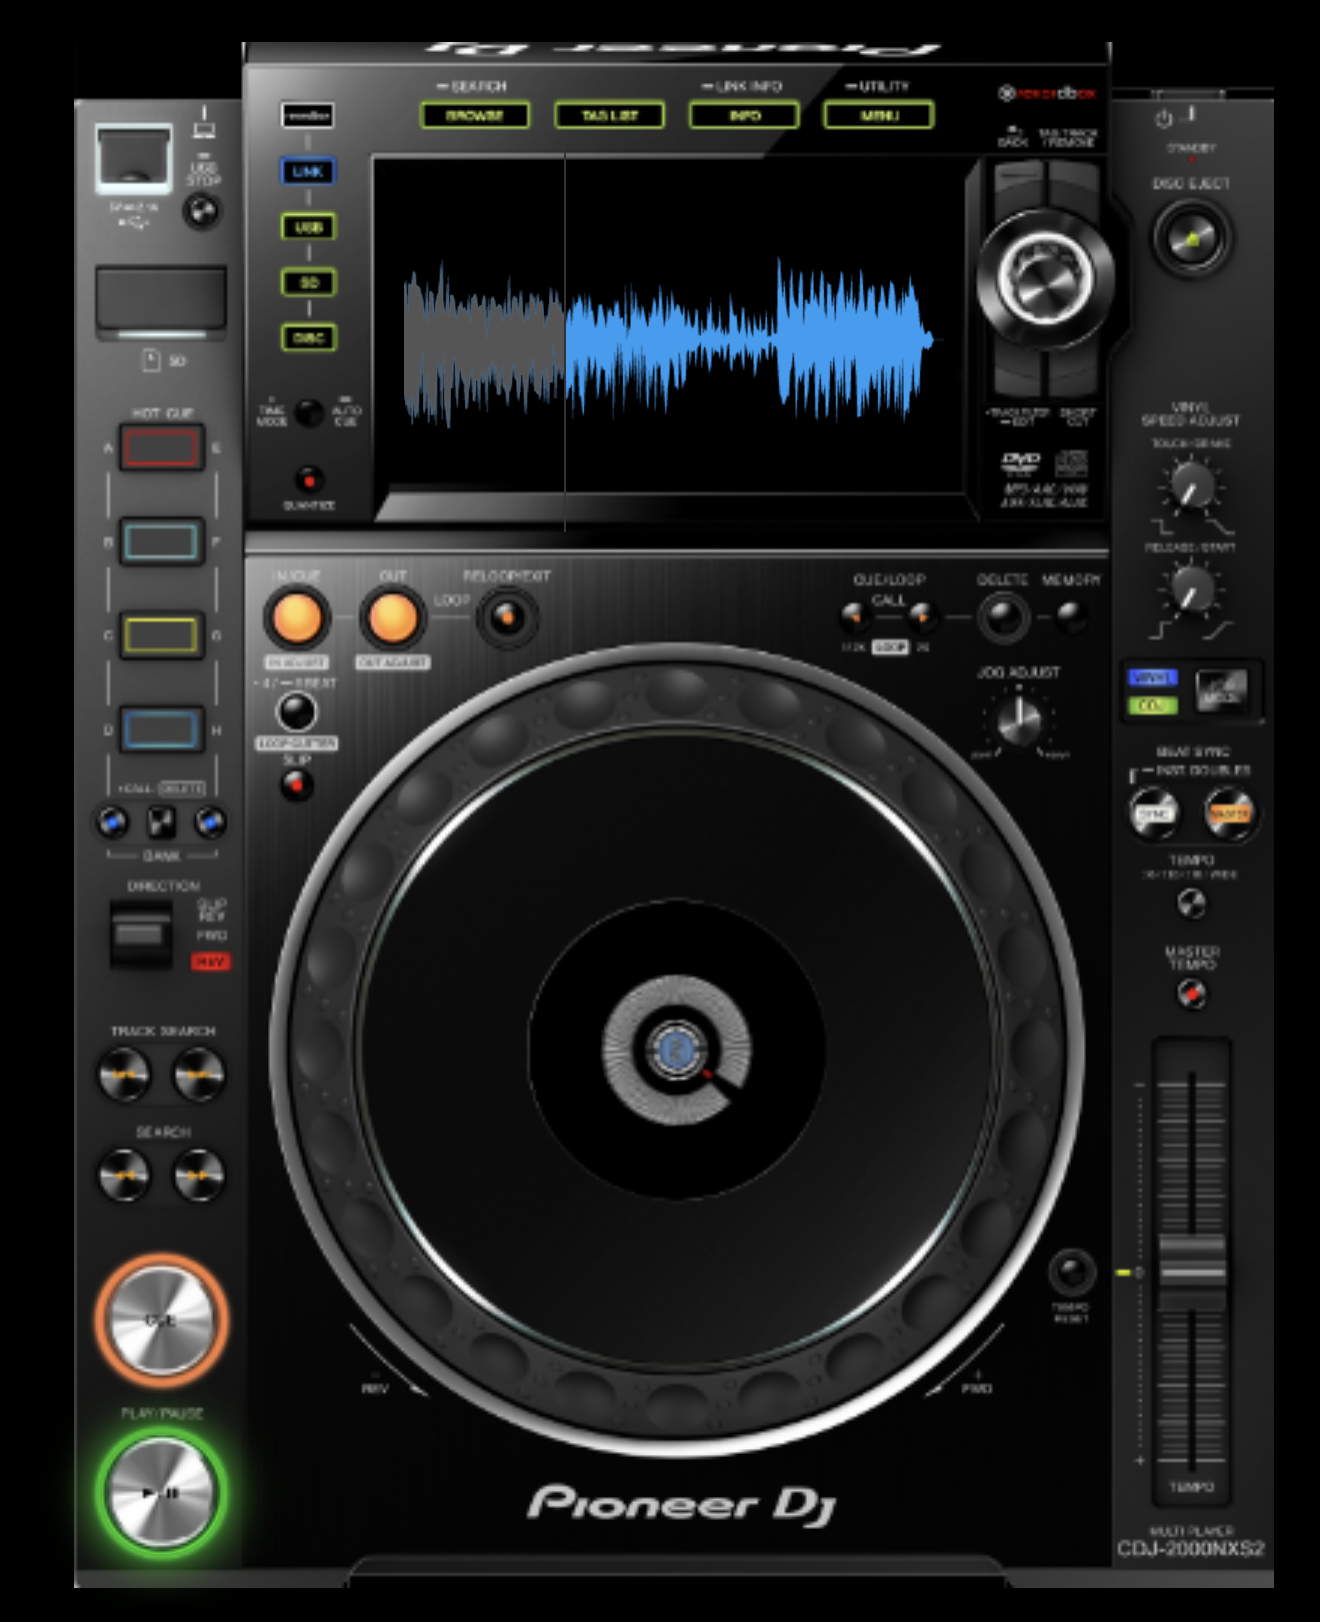
可以运行下面的的代码生成:
OSUICode::run_example(
 "intro/dj-system",
  package = "OSUICode"
)
HTML basics
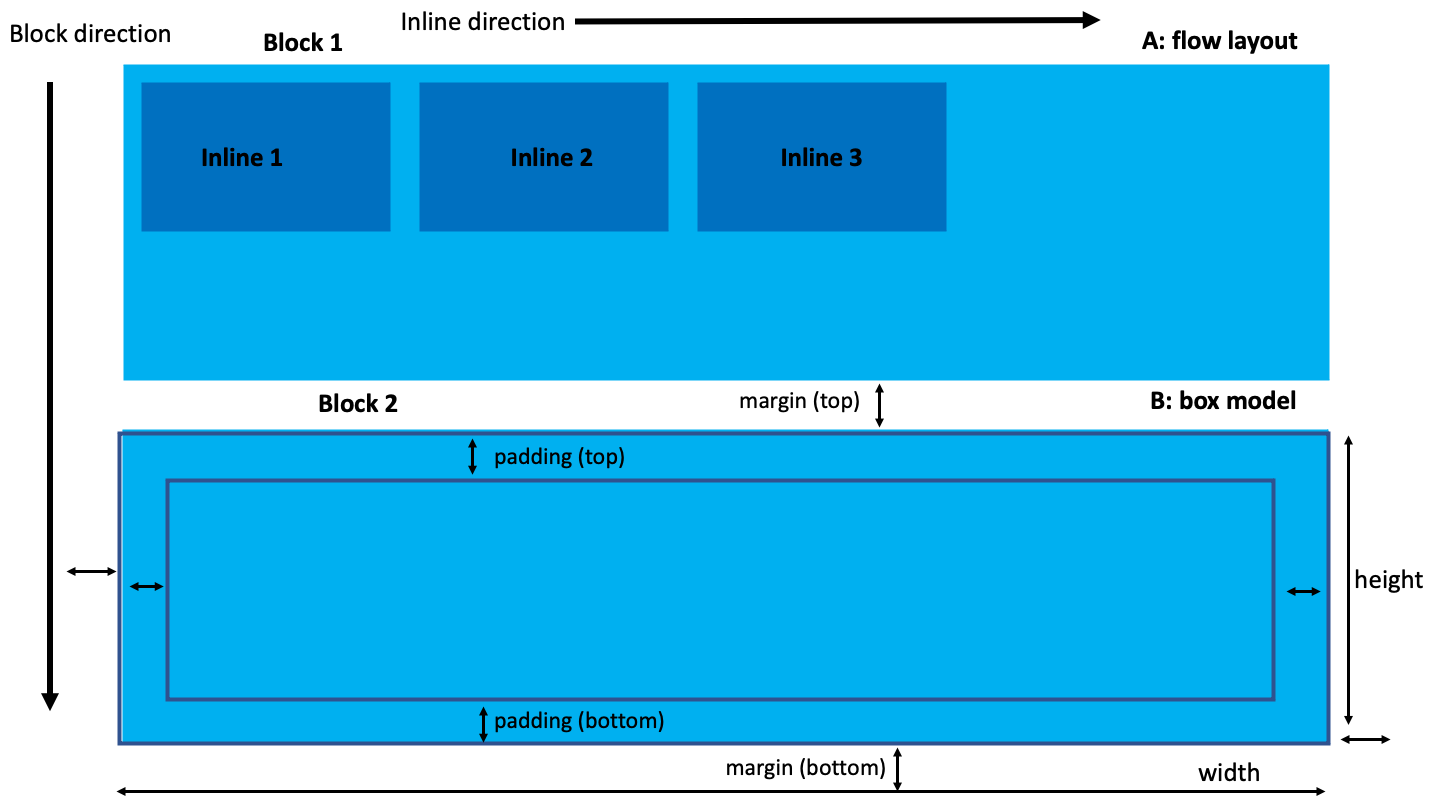
html 中的 tag 元素遵循 box-model 模型,即元素被分为 4 个部分:padding、margin、boder(width & height) 和 content。元素的排列方式称为 flow layout。据此,元素可以分为:
- Block,可以包含其他 tag 元素,元素相互叠加显示,例如
<div>。 - Inline,在一行显示,不能包含 block 元素,例如
<a>、<img>、<span>等。 - Inline-block,允许在一行中插入 block 元素。
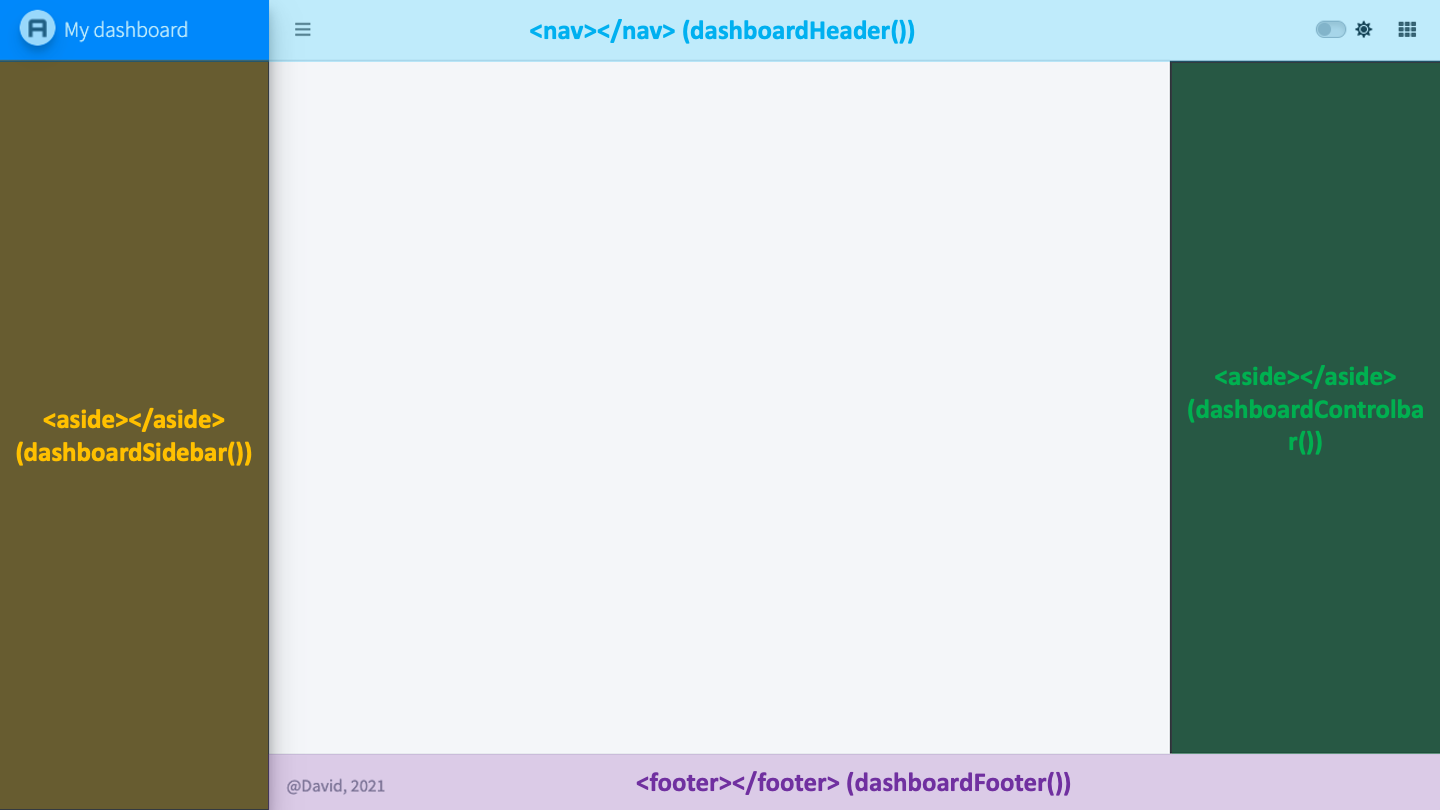
<div>, <span> 这两个标签是没有语义的,不同于 <header>, <footer> 等标签,如 Figure 3 所示:
Tag attributes
标签具有属性(attribute),用来控制标签的样式和行为。最常见的是 id 和 class 属性,其中 id 属性唯一,class 属性可以重复。除 HTML5 规定的标准属性外,还有可以使用非标准属性(non-standard attributes),如 data-* 属性,这些属性会被 JS 代码读取使用。
<div class="awesome-item" id="myitem"></div>
<!-- the class awesome-item may be applied to multiple tags -->
<span class="awesome-item"></span>
The simplest HTML skeleton
下面是一个最简单的 HTML 骨架,其中只有 <body> 部分会显示在屏幕上。
<!DOCTYPE HTML>
<html lang="en">
  <head>
  <!-- head content here -->
    <title>A title</title>
  </head>
  <body>
  <!-- body content here -->
  </body>
</html>
W3C validation 可以检查 HTML 文档的语法,并且提出 HTML 文档至少要有一个带 <title> 的 <head> 标签和带有 lang 属性的 <html> 标签。
About the Document Object Model (DOM)
Visualizing the DOM with the developer tools
DOM(Document Object Model)是 HTML 文档被浏览器读取后生成的对象模型,它存在于内存中,可以被 JS 脚本访问修改。使用浏览器的开发者工具可以查看 DOM ,如 Figure 4 所示:
Web Inspector 101
浏览器的开发者工具不仅可以用来显示 HTML 结构,还可以:
- 实时动态地修改希纳是 CSS 。
- 对 JavaScript 代码进行调试。
- 在终端中运行 JS 代码。
- 监管任何警告和错误。
- 切换不同设备情况下的显示情况。
我们以一个 shiny app 为例,对这些功能进行快速练习:
library(shiny)
ui <- fluidPage(p("Hello World"))

server <- function(input, output, session) {}
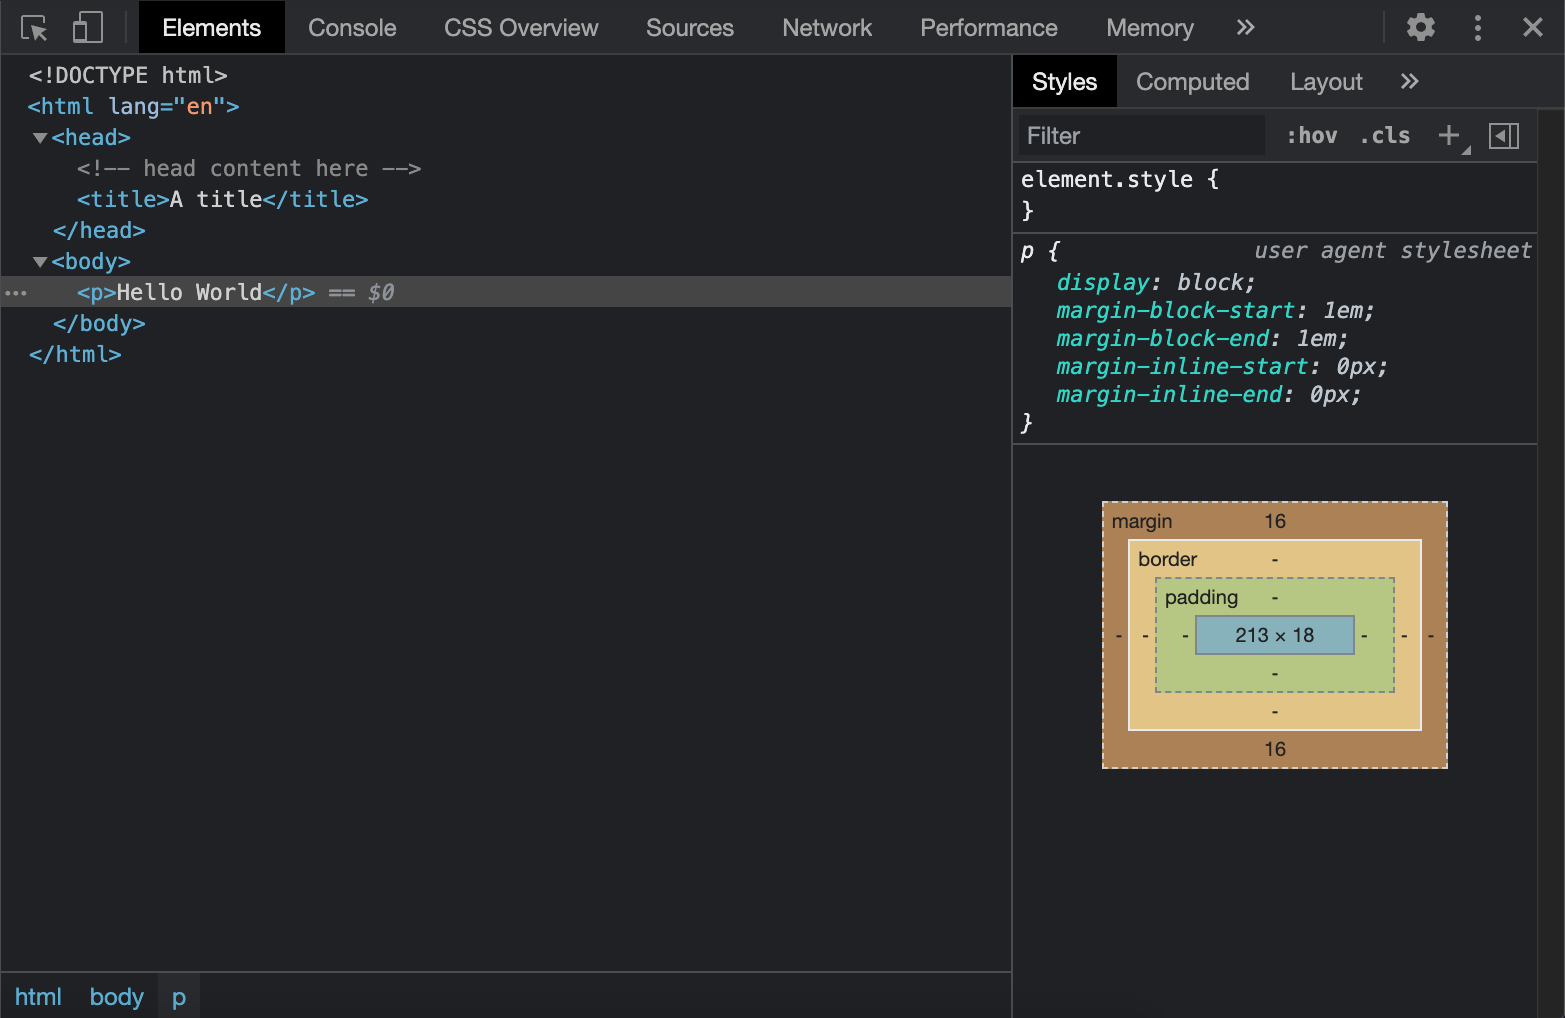
shinyApp(ui, server)- 使用
Inspect按钮可以定位所选内容在 HTML 结构中的位置,当鼠标悬停在内容上时,会显示内容的 CSS 样式,如 Figure 5 。
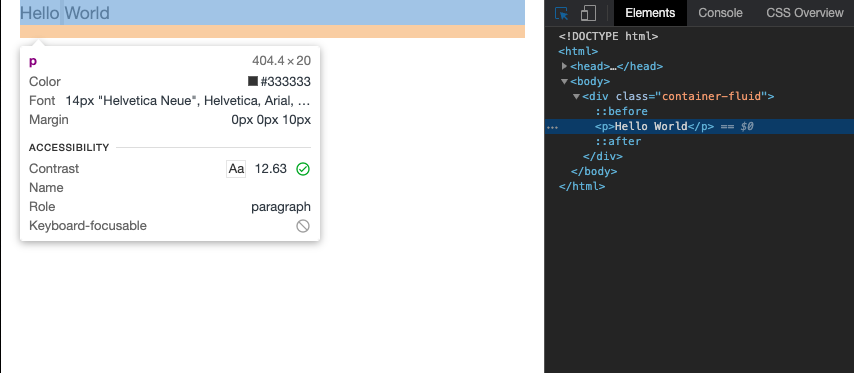
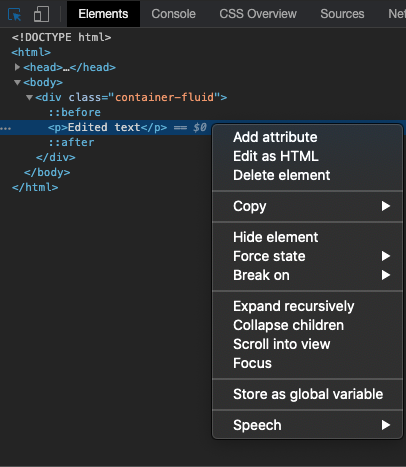
- 在
Elements面板中,可以双击<p> </p>标签,修改它的内容。单击右键后会展示更多可以执行的操作:添加属性、修改内容、拷贝删除隐藏标签、提取XPath等。见 Figure 6 。
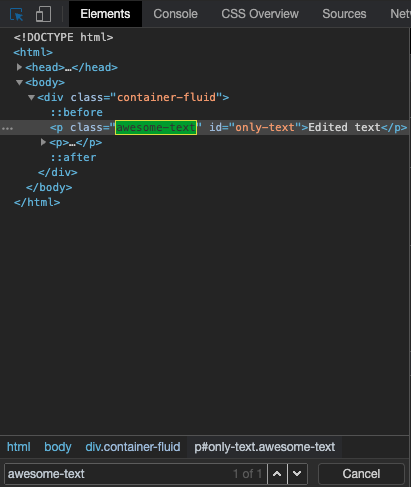
- 使用
Ctrl + F可以在 HTML 文档中搜索内容,如 Figure 7 。
Preliminary introduction to CSS and JavaScript
CSS
CSS 可以重新定义特定标签(class、id属性)的样式,例如我们对 p 标签赋予红色,可以这样写:
p {
  color: red;
}
在 HTML 中,我们可以把 CSS 放在 style 标签中:
<!DOCTYPE HTML>
<html lang="en">
  <head>
    <style type="text/css">
      p {
        color: red;
      }
    </style>
    <title>A title</title>
  </head>
  <body>
    <p>Hello World</p>
  </body>
</html>
在 shiny 中,可以使用 tags$style() 函数来定义 CSS 样式:
JavaScript
JavaScript 赋予了 web-app “灵魂”,允许我们直接操作 HTML 中的元素。例如下面的例子,定义了 changeColor() 函数,该函数能随着点击改变 <p> 标签的样式:
<!DOCTYPE HTML>
<html lang="en">
  <head>
    <style type="text/css">
      p {
        color: red;
      }
    </style>
    <script language="javascript">
      // displays an alert
      alert('Click on the Hello World text!');
      // change text color
      function changeColor(color){
        document.getElementById('hello').style.color = color;
      }
    </script>
    <title>A title</title>
  </head>
  <body>
    <!-- onclick attributes applies the JavaScript
    function changeColor define above -->
    <p id="hello" onclick="changeColor('green')">Hello World</p>
  </body>
</html>
同样可以使用 shiny 进行构建:
ui <- fluidPage(
  tags$script(
    "alert('Click on the Hello World text!');
     // change text color
     function changeColor(color){
       document.getElementById('hello').style.color = color;
     }
    "
  ),
  p(id = "hello", onclick="changeColor('green')", "Hello World")
)

server <- function(input, output, session) {}

shinyApp(ui, server)